I knew when I got my KLR650 that I wanted hard cases on it. I looked at the various aluminum boxes that are out there, but they are all VERY expensive!
I also had read about various other things that people have used as hard cases: ammo boxes, ration cases, Rubbermaid boxes, etc., but what struck me as the best solution was Pelican cases.
Pelican cases are injection-molded structural foam boxes, built to Mil-Spec, and are light-weight, waterproof, dustproof, and float with a load in them. Not only that, but I have read about others who had done exactly this with them, and were more than satisfied with the result!
So here I am with my OWN "How to install Pelican cases as KLR650 luggage" page!
First, the trunk. (Incidentally, I haven't found ONE tutorial that shows this part of the process. Plenty of pics of cases mounted on bikes already, but nobody thought to document it until now?)
|
I used the Pelican 1550 case for the two panniers, and the Pelican 1500 case for the trunk. Cases-4-Less has some great prices on these boxes. I only spent about $250 for ALL THREE cases, including shipping.
|

|
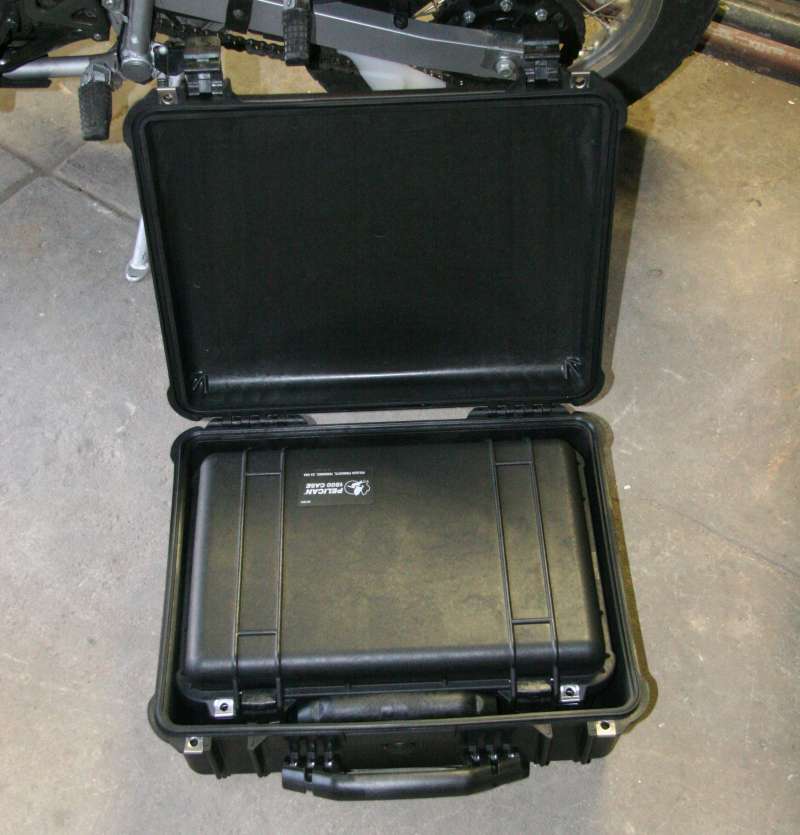
Here's a comparison of the size difference between these two cases. As you can see, the 1500 fits completely inside the 1550.
What's the point? None, really. I just had a thought after I saw the cases that it wouldn't be unreasonable to use a 1550 case for the trunk as well. I may try it sometime.
|
|
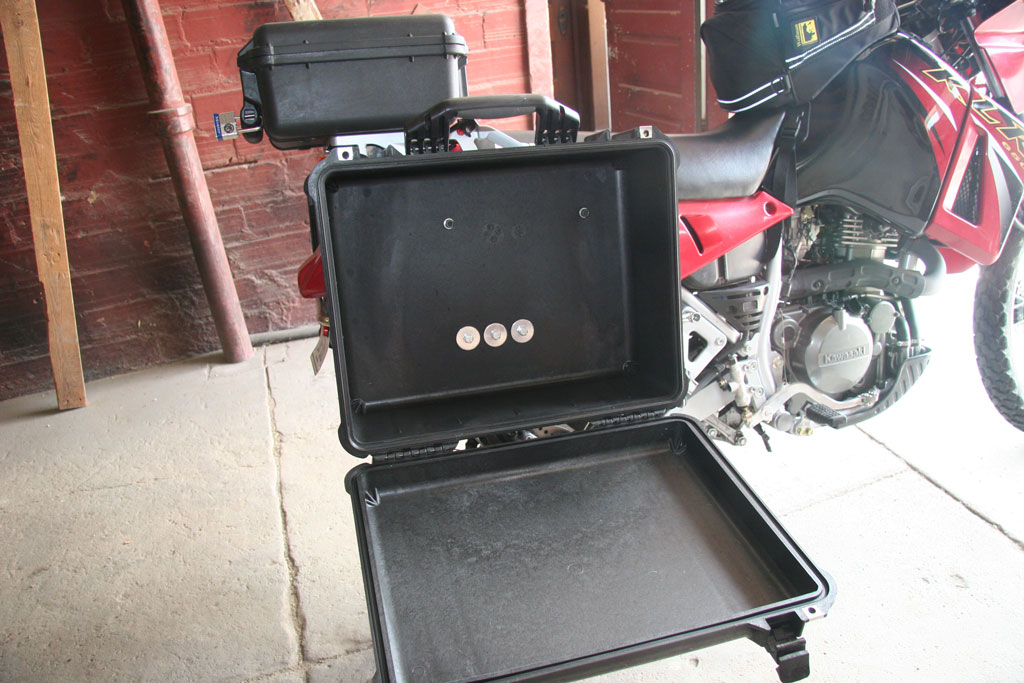
Here is the 1500 case, preparing to be mounted on the tail rack of my KLR.
|

|
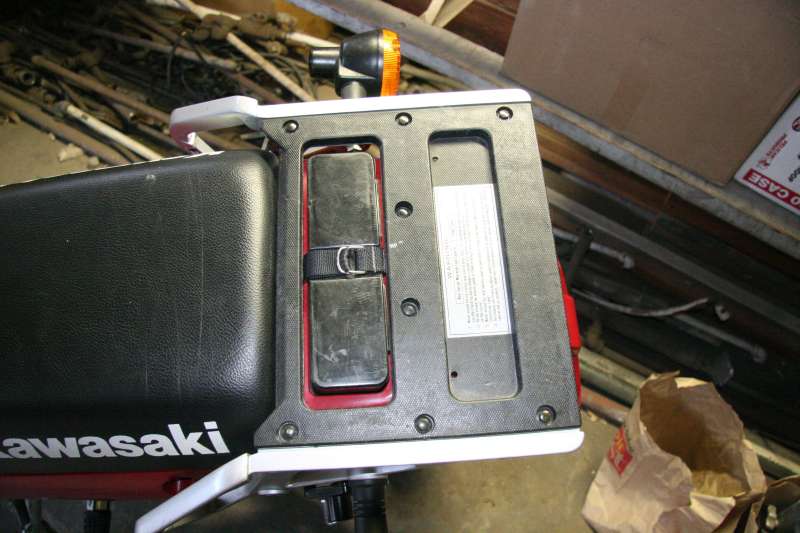
A close-up of the rear rack. Notice the eight bolts? My plan is to use four of them to attach the case.
Note: These bolts are 8mm metric heads, and you will need a socket to get them out. There is also a brace located underneath the front two bolts, as the rack is under tension from the frame. I had to squeeze the rack rails together slightly to put the plate back.
|
|
Next, I removed the rear rack plate from the bike so I could use it as a template. Notice the position of what are the outside center and rear bolt holes in the plate? They end up centering quite nicely on the case. Should balance, overall.
Notice that the toolbox access will be covered by the case, necessitating the relocation of the tool kit. I'm planning on making a tool tube for that. In the meantime, I'll just let it rattle around in the trunk.
|
|
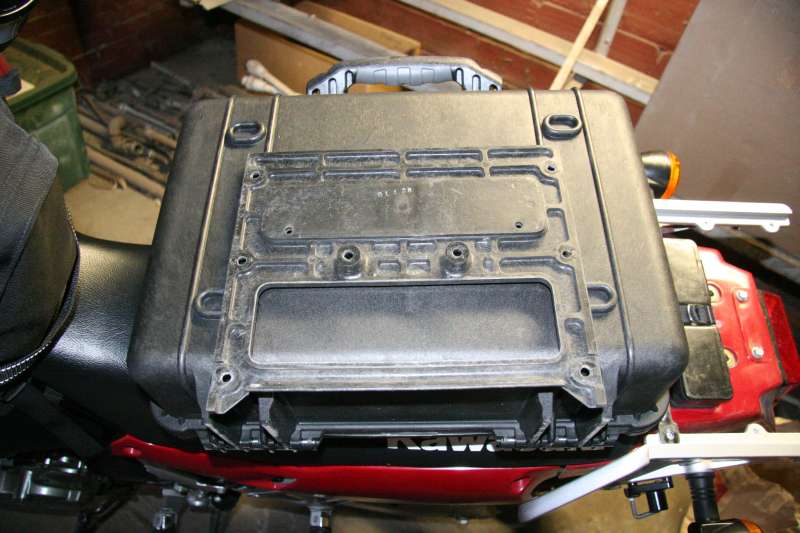
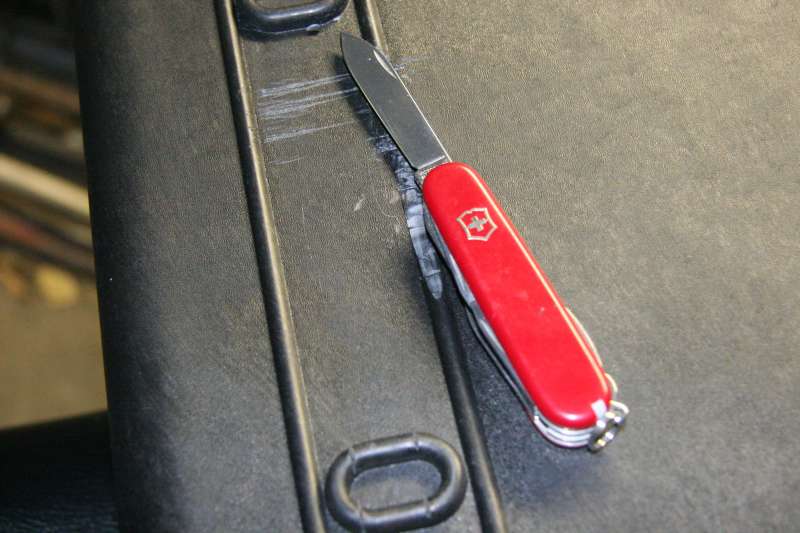
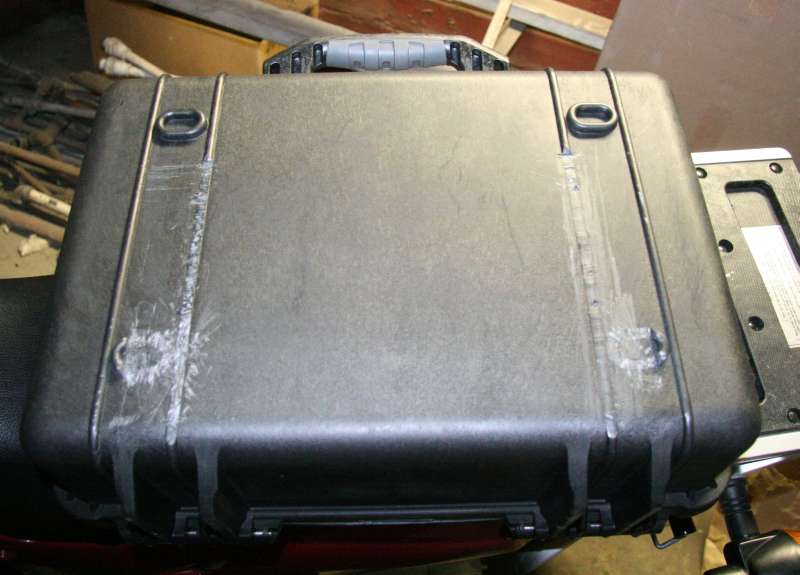
I noticed that two of the ribs and two of the feet would be in the way of a nice flush mount, so I trimmed them off with my trusty Swiss Army knife.
|
|
Here is the result. It's not pretty, but nobody will be seeing this part of the case anyway, and I can now have the bottom of the case flush with the top of the rear rack.
|
|
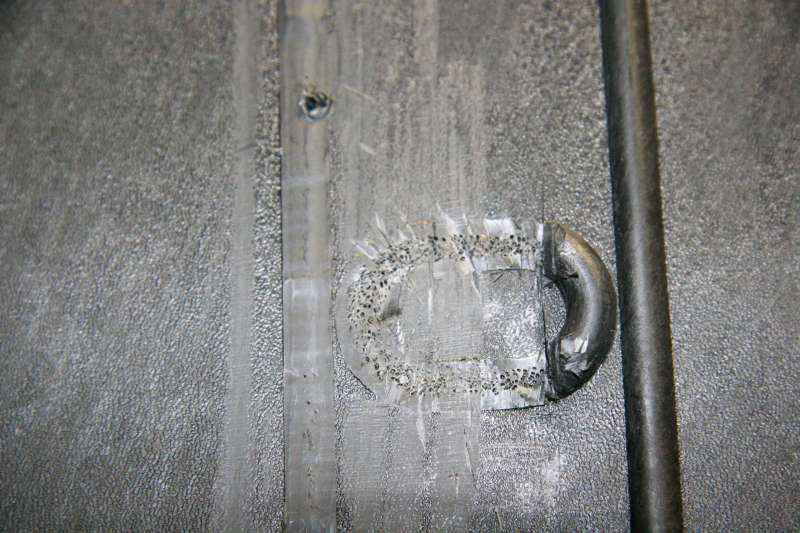
Here's a close-up of one of the trimmed feet.
I measured across the rack to ensure I was removing enough material. The rack measures 12" across, incidentally.
|
|
In order to fasten the box to the rack, I needed to replace the four bolts with longer ones. The originals are 6mm bolts with 8mm heads.
I used 6mm x 40mm stainless steel socket-head bolts, but they seem to be a bit too long now. I might be able to get away with 20mm, but I know I could go down to 30mm without any trouble.
Use fender washers to increase the surface area covered by the bolt head in order to reduce the likelyhood that the bolt head will get pulled through the box under pressure.
|
INSERT PHOTO HERE
|
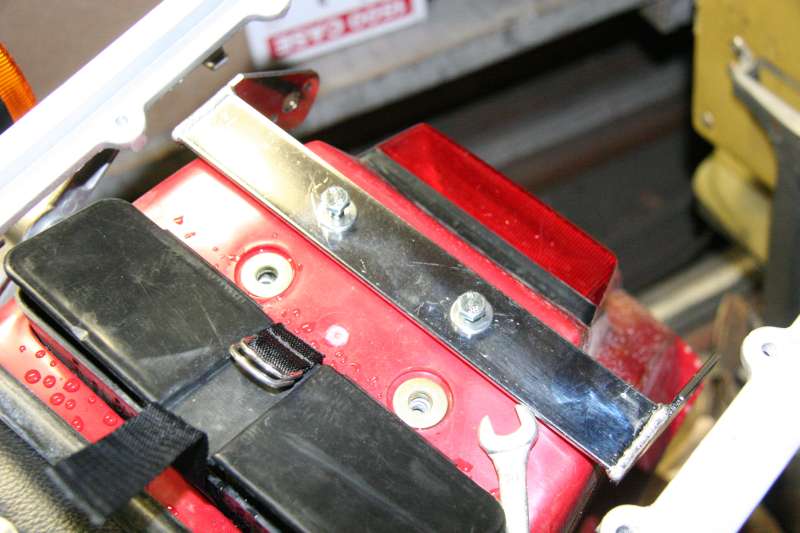
I used the Aluminum Touring Box Mounts from klr650.com. No, they aren't made out of aluminum, they're stainless steel. They are intended for mounting aluminum touring boxes...get it? ;)
|

|
This particular rack is manufactured by Studebaker, who also make a number of other accessories for the KLR, as well as for other motorcycles. The rack kit comes with everything you need to mount them on your KLR, minus the tools that you should already have in your stock toolkit and the antisieze compound they tell you to use. They even give you a nice 8mm T-wrench for the rear rack plate fasteners! For some reason, I thought these would be black powdercoated, but they are polished stainless steel!
|

|
It seems that they provide at least one extra piece of hardware for each bolt, washer and nut they provide, just in case you lose one or something. Nice touch!
|
INSERT PHOTO HERE
|
Installation is pretty straightforward. Give the directions a complete once-over before you start, though!
|
INSERT PHOTO HERE
|
The first thing you do is mount the turn signal relocation bracket. For this you need to remove the rear rack plate.
|
|
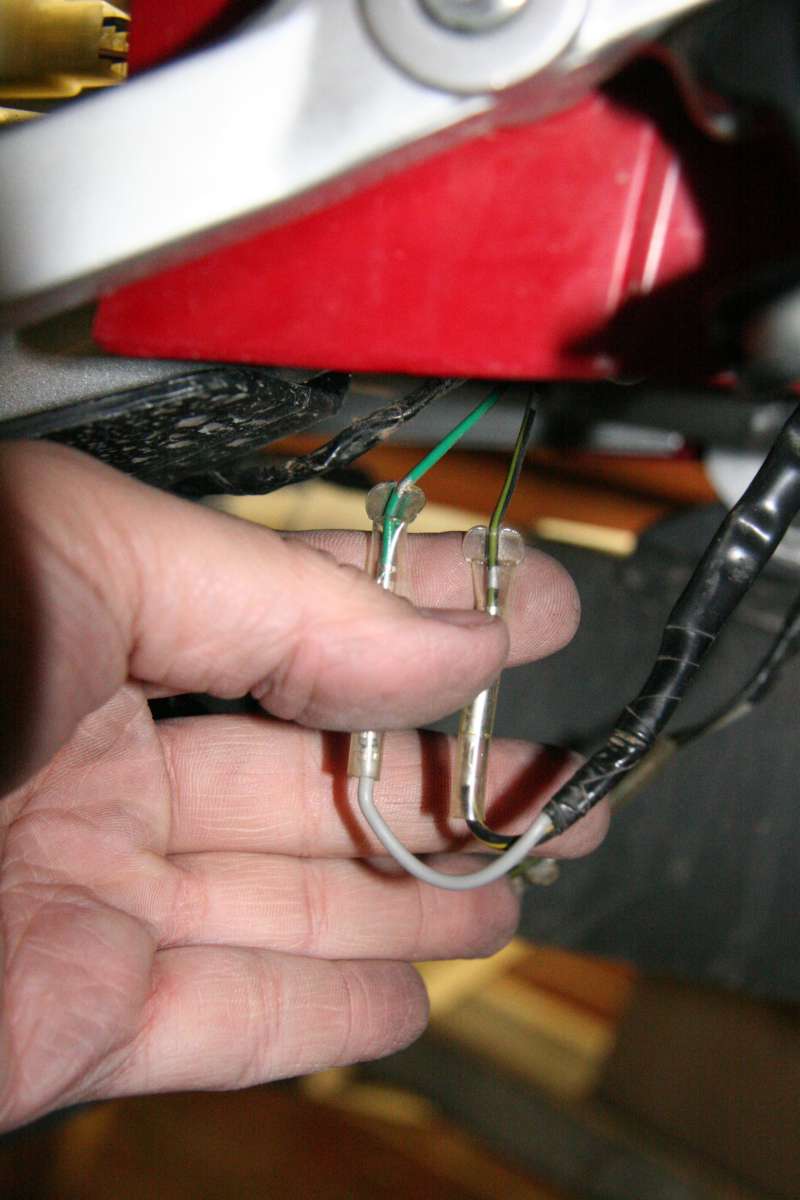
Remove the turn signals from their position on the rack rail (one at a time, please!); note the wiring colors.
NOTE: You MAY need to lengthen your turn signal wires. I was lucky and didn't need to (it was close!), but others have reported their wires weren't long enough.
|
|
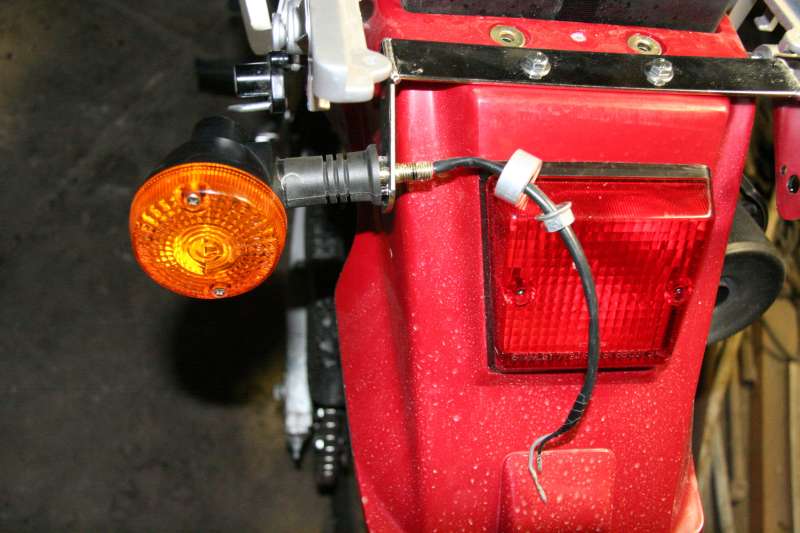
Place the turn signals in their new place on the relocation bracket, using the spacer provided, along with the stock nut. Re-run the wires back through the fender and reconnect. Repeat for the other side.
|
|
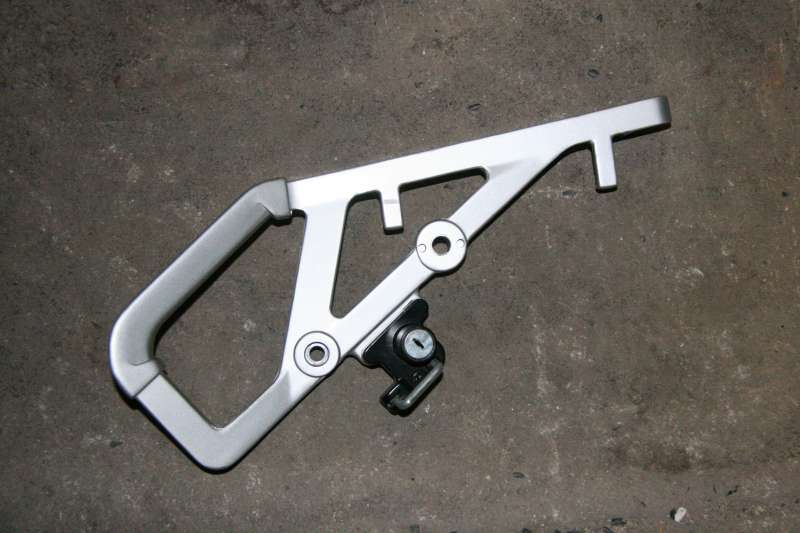
Next, finish removing the side rail for the rear rack. You will be replacing the existing bolt with a new one from the kit. Don't lose the flange washer from between the rack rail and the fender!
|
|
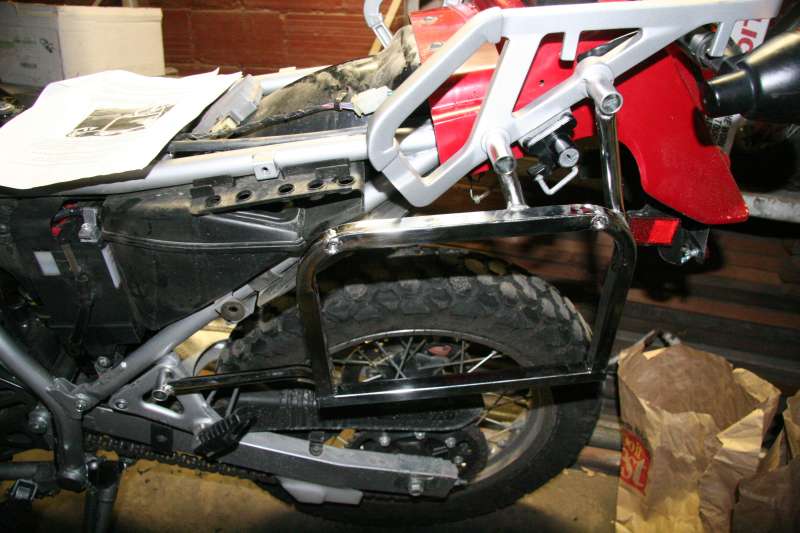
Remove the top bolt from the rear footpeg mounting bracket. This bolt will also be replaced with a new one.
|
|
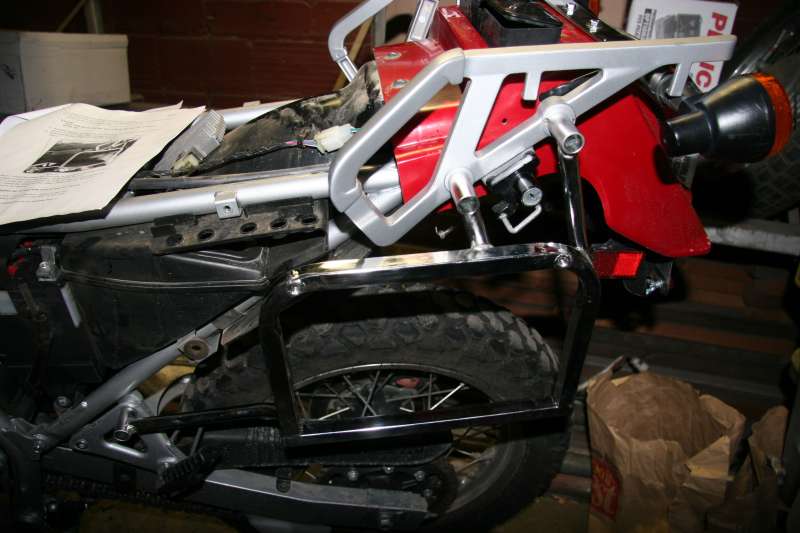
Start each new bolt by hand, applying anti-sieze compound to the first two. The third bolt goes where the turn signal used to be, and is secured with a locknut, so anti-sieze compound is not needed here. This one can be started before the other two...I found it to be somewhat helpful in keeping everything together when trying to start the other two.
|
|
Just repeat the process for the other side.
|
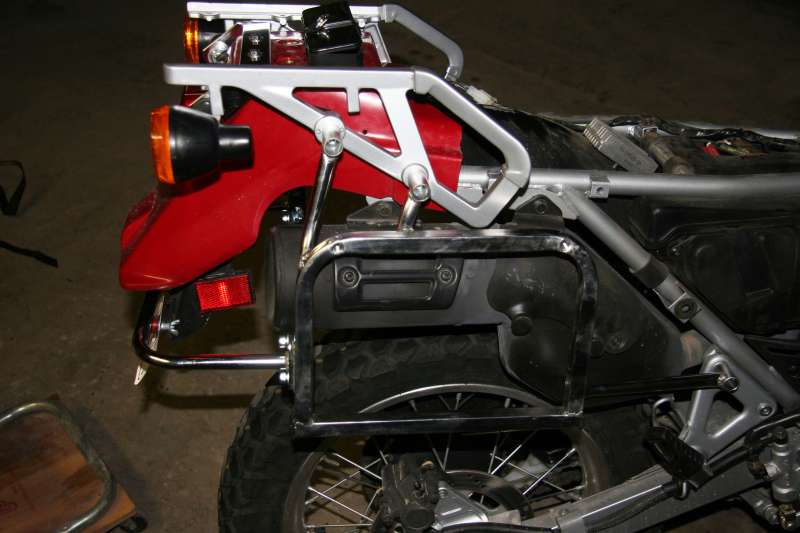
|
Bolt up the cross-brace between the two side racks. I found it worked easier to put both bolts through one side first, then bend things around slightly to get the other side to line up.
|
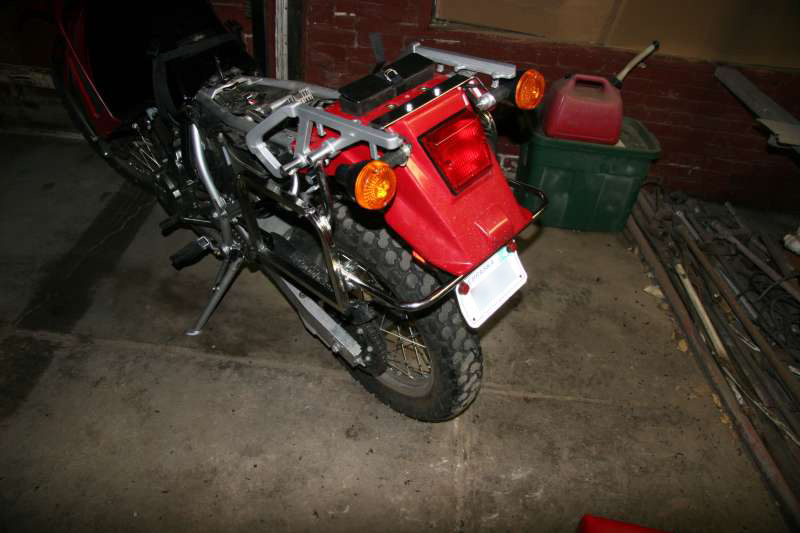
|
I finally got everything together, though it was an extremely tight fit! I was worried that I wouldn't get it to fit, but patience (and a staggered tightening order) finally got it all together!
|
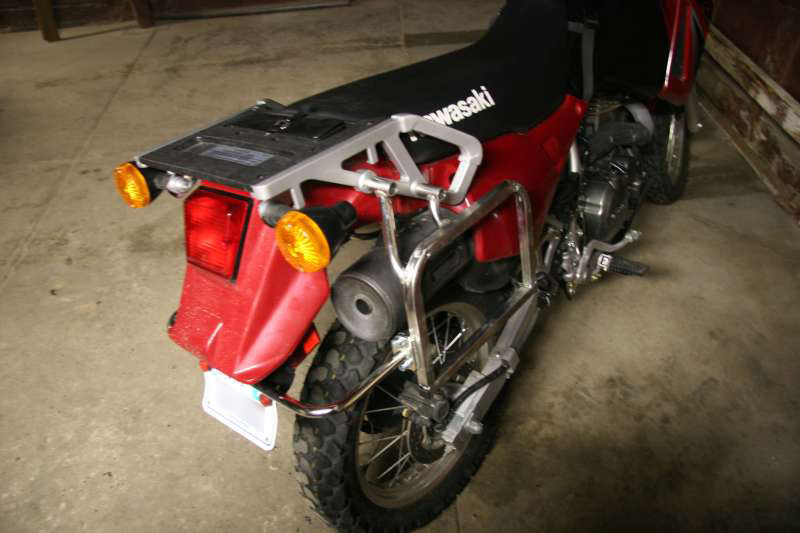
|
Everything fit MUCH tighter than I was expecting! The right side footpeg support bracket actually touches my muffler, though I'll have to see if this has any negative effects. It doesn't seem to be for now.
|
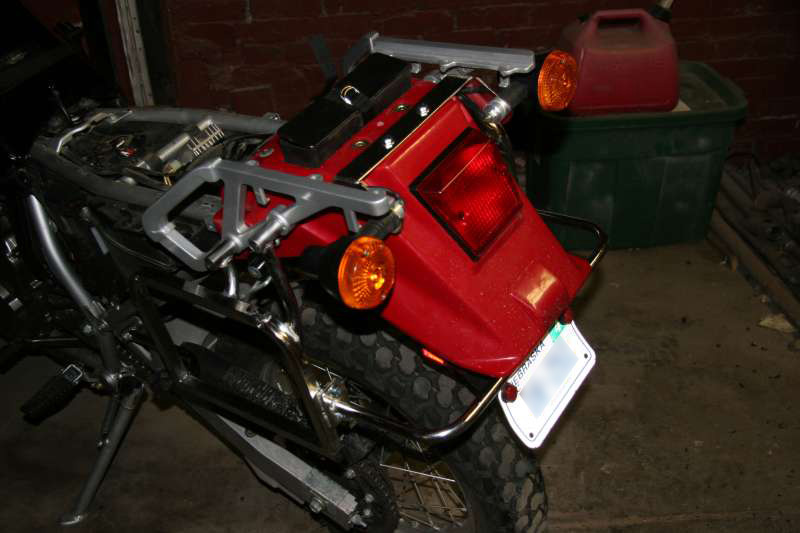
|
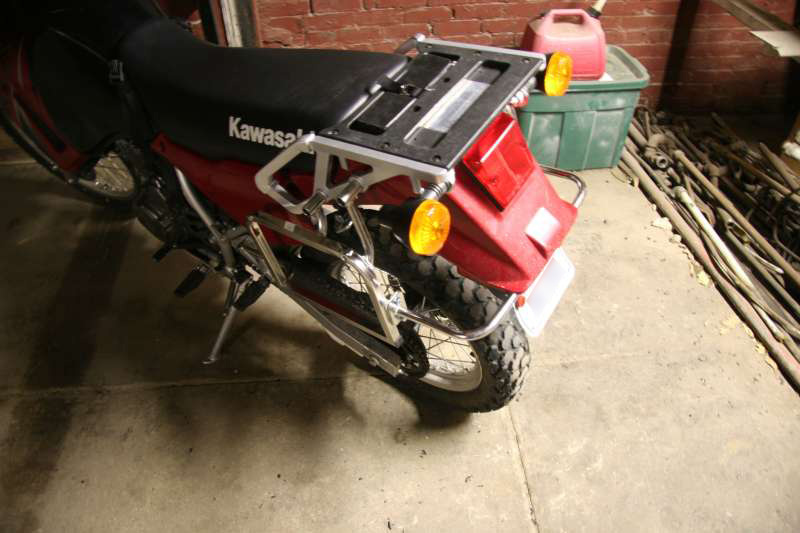
I had originally mounted my license plate up higher, using the bottom bolt holes, but the cross-brace wants to sit right on top of that part of the rear fender. So I ended up mounting my plate lower. I also bent the bottom of my plate out a little bit, to help keep it from catching on my rear tire, as has been known to happen occasionally on the KLR.
|
|
The finished job! These are the shiniest parts on my KLR now! (Kinda looks out of place, but it will get covered with the Pelican boxes soon enough!)
|

|
Now to mount the side cases. I didn't purchase any kind of mounting kit, so I decided to make my own. I searched around for suitable parts and materials, but wasn't finding much that wasn't going to cost me more than purchasing the mounting kit would.
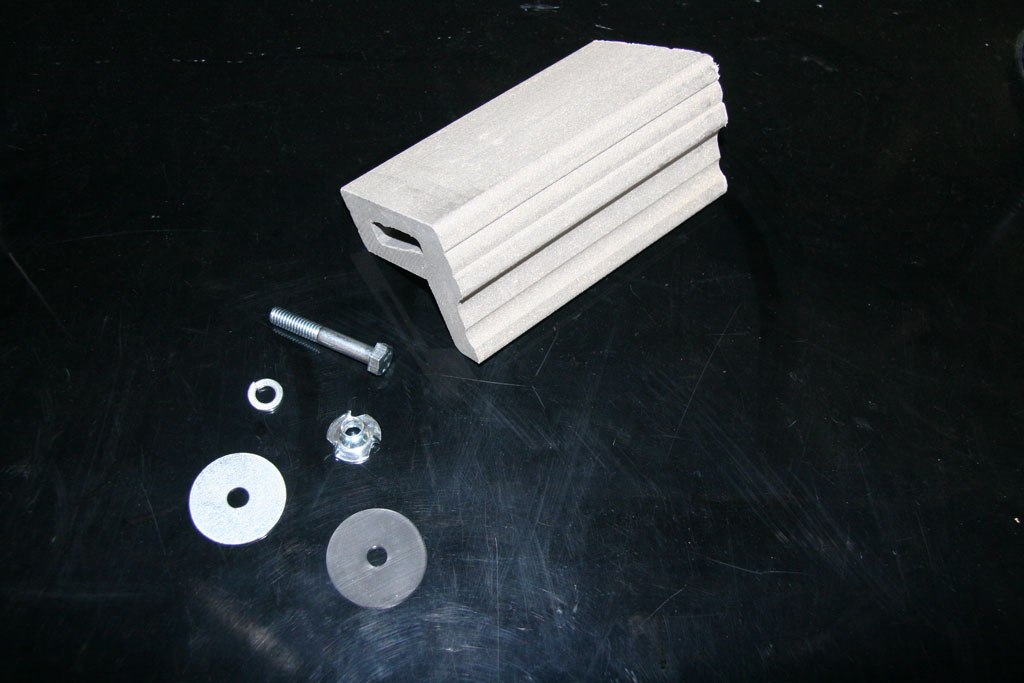
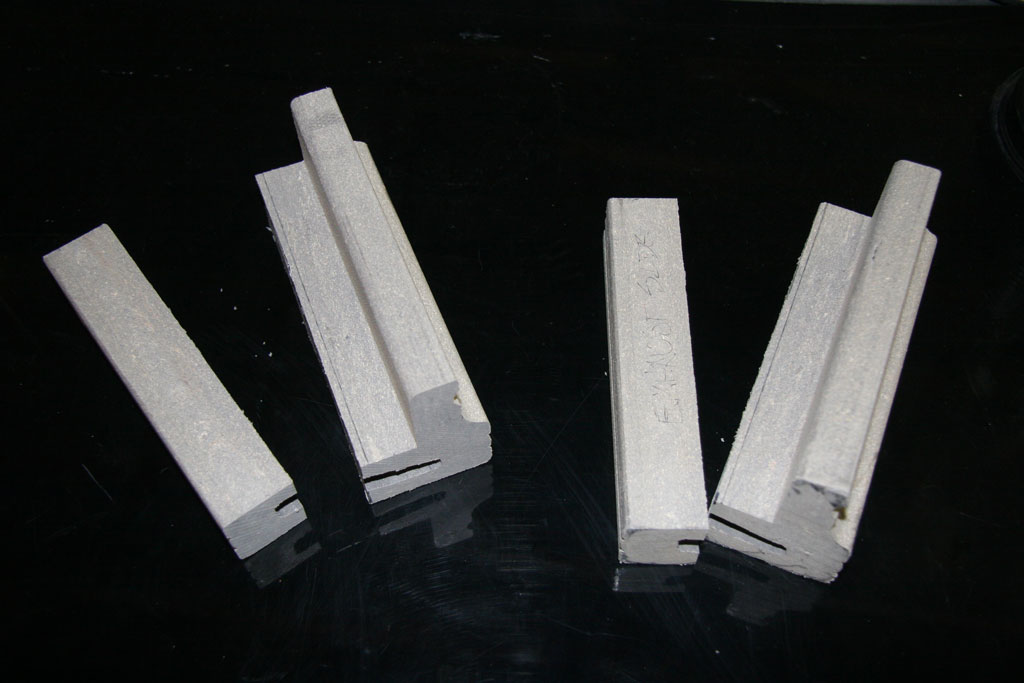
I finally found the material I needed one day at Home Depot! It is composite decking material, specifically cap railing, made from wood fiber and polymer resin. Durable, waterproof, and works like wood. Not only that, but an 8-ft piece was only $25. True, that's half the cost of the Happy Trails mounting kit, but I have PLENTY of material to experiment with! In any case, I had the fine folks at Home Depot cut the 8-ft piece into manageable chunks (including two 6-inch pieces) that I would be able to get home with on the KLR.
|
|
I knew the material was the right shape, but it was still too big, and needed to be trimmed. With that in mind, I placed each of the 6-inch blocks across the bottom rail of the side racks, and drew a line across the block. I also knew that the cases have ribs across the backs, so I measured these (roughly), and added that to the marked width. This turned out to be about 2 inches, so I marked a new line across the blocks, then trimmed them down with my table saw.
|
|
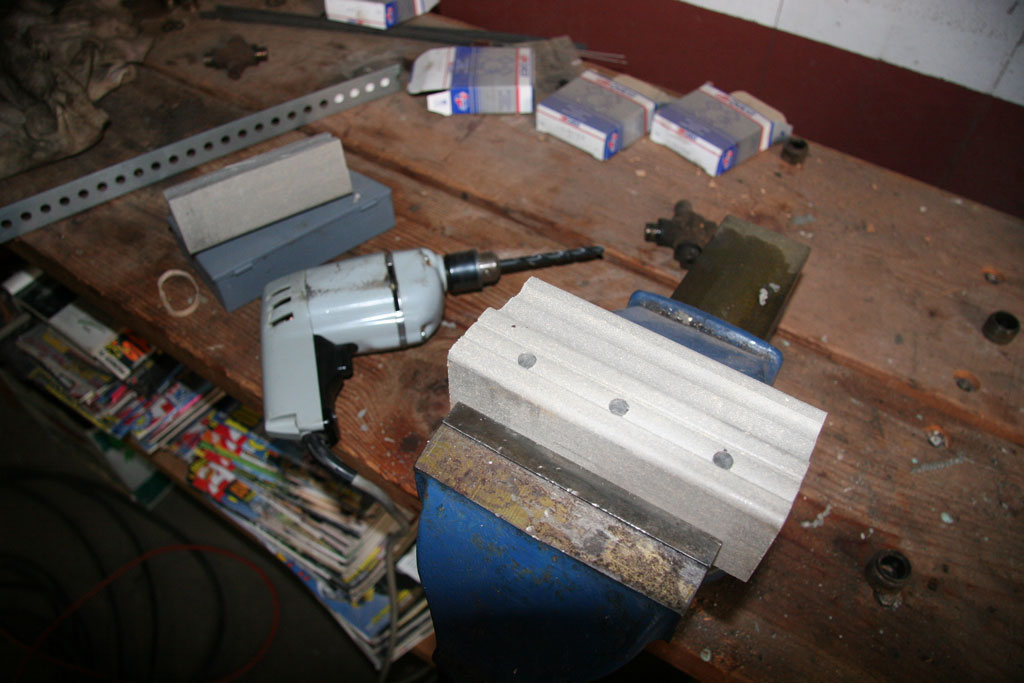
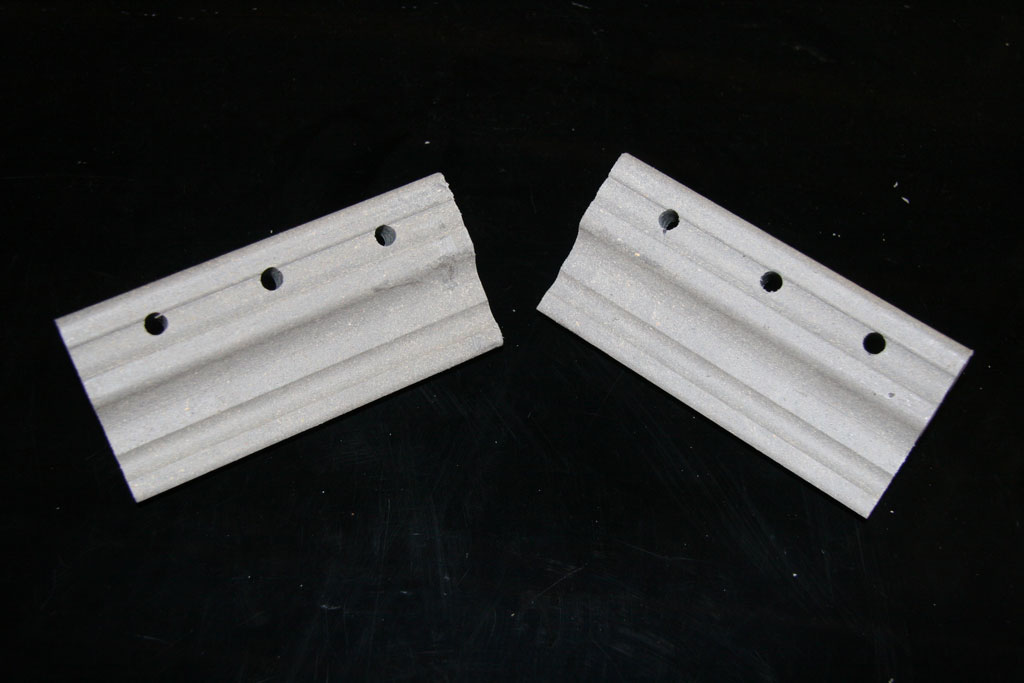
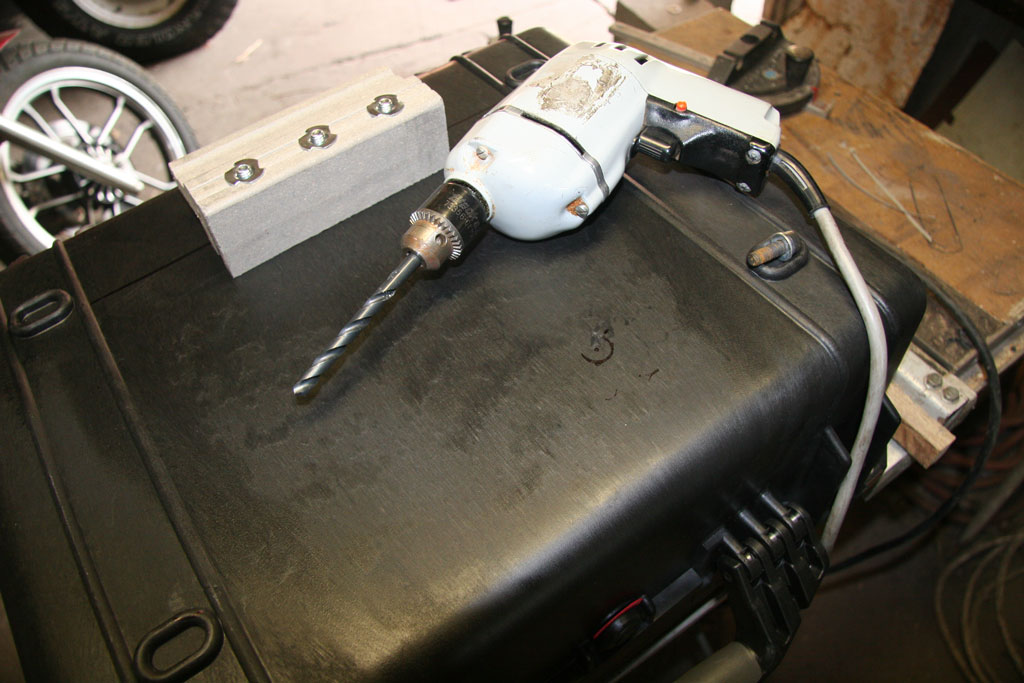
Now I drilled the holes in the blocks, allowing for the extra thickness of the spiked nut's collar. I clamped the blocks gently in my bench vise and used my hand drill (no drill press). This is where the easy workability of the material was nice!
|
|
At this point is where I figured the length of the hardware I would need to mount my new brackets to my cases. As the brackets were now 2 inches thick, and I needed to account for the thickness of the case wall, I figured on 2.25 inch bolts. I ended up picking up the following hardware(6 each):
2-1/4"x5/16" bolts; 1"x5/16" fender washers; 1"x5/16" rubber washers; 5/16" split lock washers; 5/16" spiked nuts.
I also picked up (4 each): 8mmx20mm stainless bolts; 8mm center fender washers; 8mm split lock washers; 1/4"x1" rubber washers.
|
|
Once the blocks were drilled properly, I marked the cases for mounting the blocks to them. Taking a leftover piece of the material, I lined it up across the tops of the two bottom feet and drew a line (This was where I wanted the bottom edge of my brackets to be). I then placed the drilled block approximately centered along the line, then drilled the holes through the blocks into the case, holding the blocks by hand.
|
|
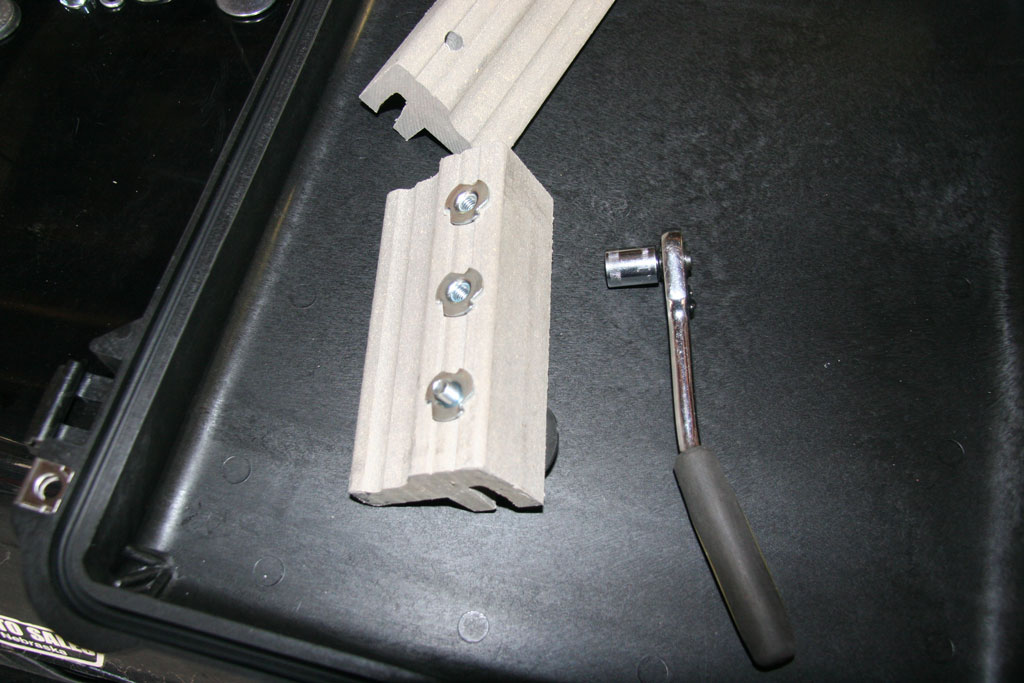
Now that the holes were drilled in the cases (and the parts marked as to which block went with which case), I started assembly by seating the spiked nuts BEFORE I attached them to the cases. Once this was done, I assembled the pieces: Bolt/lock washer/fender washer/rubber washer/case/block/nut.
|
|
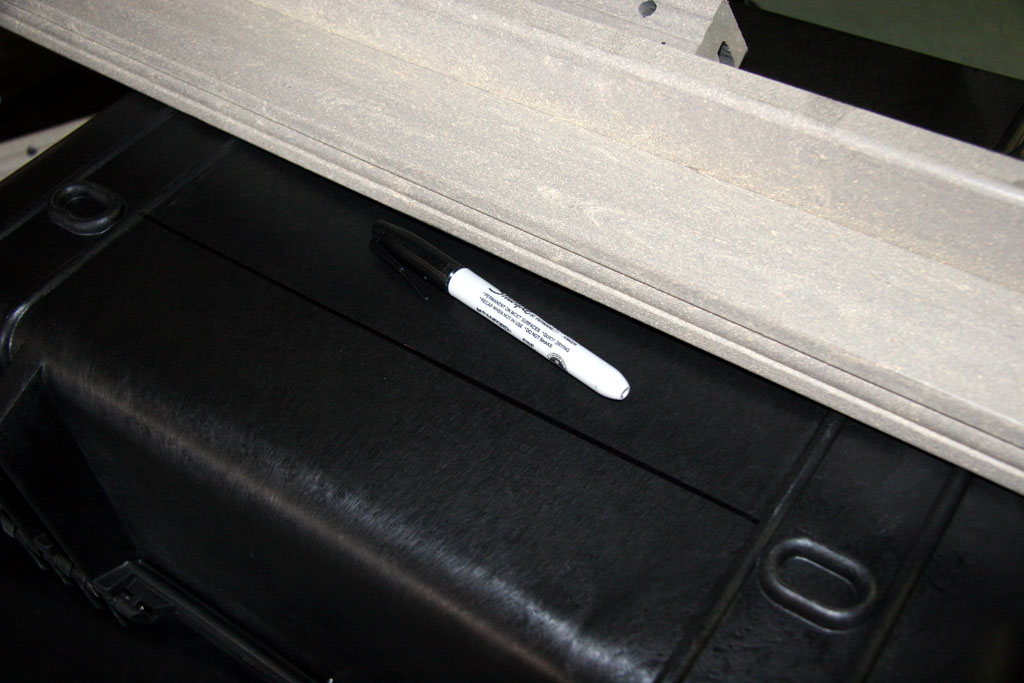
Now I needed to drill the top holes. I started by placing the case on the rack and positioning it where I wanted, then noting the position of the top holes in the rack. I had the bolts screwed into the racks, then drew around them on the case with a black marker. I then removed the case, drilled the holes, and finally attached the case. Done! Well, almost...needed to adjust the placement of one of the holes, but that's not too bad!
|
|
I just followed the same procedure for the other side, and that was that...cases all mounted up and ready for whatever! NOTE: The two bolts in the top of the case as pictured are NOT the final ones I used! They are just what I had on hand at the time. After I got the cases mounted, I went to the hardware store (have to ride 25 miles!) to get the stainless hardware that is in place now.)
|
|
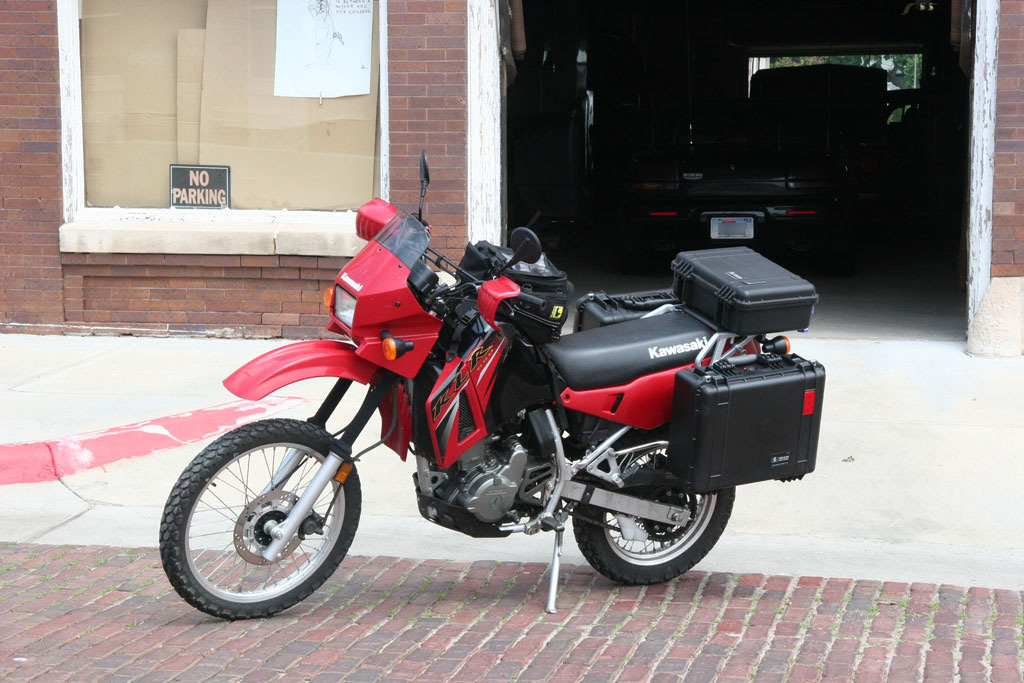
See the red reflector on the side of the case? I noticed that the rear side reflectors on the KLR would be covered by the cases, so I thought I would compensate with new ones on the cases themselves. (The originals are still there, for whenever I may take the cases off). The new reflectors were purchased at Wal-Mart for less than $2, if I remember correctly. Not only that, but they fit the space between the ribs PERFECTLY. I've already had people assume that the Pelican boxes were intended for use as motorcycle cases because of that!
|

|
You can see my Wolfman Explorer tankbag here. I won't go without any kind of tankbag, and the Explorer is a VERY nice one for the KLR!
|

|
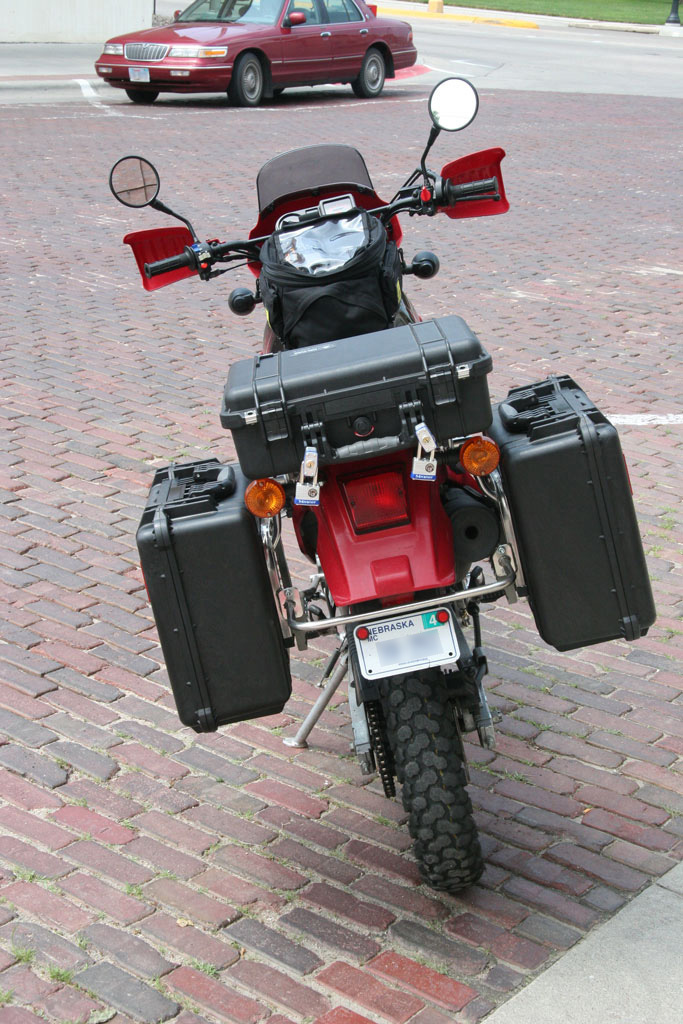
The padlocks are a 1.5" hasp, 4-keyed-alike set of Masterlocks. As you can see, they fit through the holes in the handle of the 1500 case very nicely, giving me a place to put them when I don't need to lock the boxes. No losing them that way!
I also discovered that they make a pretty good helmet lock like that, especially since you can't really get to the stock one anymore with the cases mounted.
|
|
I really like the way these turned out. They really look like they belong there!
|
|


